Friday, June 24, 2011

Our Rockin' Porch Hammocks

Wohh!! What's this, Silas is writing a post! Yeah. That's what's going on.

Anyway's, so tonight's project has been to setup two new seat hammocks for our balcony. How hard of a project could that be. :)

After about 10 minutes of finding the stud in the ceiling, we had our first hammock up. Key thing learned from this. When finding a stud in a ceiling, if your stud finder is as poor as ours is, use a extremely small bit and drill a first hole to ensure you have found the stud. If you miss, it's better to miss with a 1/10" bit rather then a 1/4" bit.

So, after hanging the first one and sitting down, everything is perfect. I reach up to the bar [Despite the DO NOT PULL ON Label], to help hoist myself up and suddenly...

...Bar split in half after leaving a battle wound in my arm. Lesson learned. DO NOT DISOBEY THE LABEL.

So, Off to Lowes. Obviously we can't return it. It was our fault.

So, the first idea was to get two small corner brackets and clamp the beam back together. After 10 minutes of looking at the option's in the Lowes, we ended up purchasing a wooden closet dowel. Six holes later, we have a replacement bar which is twice as strong as previous.


Key thing, for when drilling the holes was to drill a small hole to guide the larger one and to ensure that everything is lined up correctly.

Overall, the big take away from this is don't ever defy the wise warning labels.

Kind Regards,
- Silas

Sunday, June 19, 2011

Alligator Adventure

Yesterday, we took a trip down to Barefoot Landing and went exploring. We've been wanting to go to Alligator Adventure for a while, so we finally got the chance to fit in a nice relaxing day of wandering around wooden walkways surrounded by alligators.

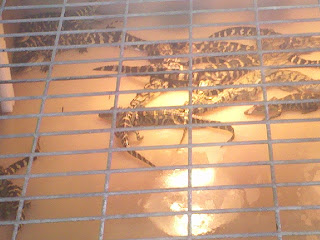
At Alligator Adventure, the main attraction is - you guessed it, Alligators! They also have turtles, some lizards, as well as crocodiles. When we first got in, we checked out the juvenile feeding pond, where they do demonstrations with little alligators as well as some snakes. Here is a shot of the young alligators all piled up.


After the show, we got the opportunity to wander around the park. I'm sure that this is possibly the scariest thing that I could see if I walked out of my house and saw this guy sitting underneath my tree. 


We also caught a glimpse of this big guy, up close and personal. I thought that I could probably smuggle him out under my shirt, but I think he's pretty heavy. His shell was so hard and smooth, but if you touch their hand, they're kind of squishy and scaly. He was really relaxed and hardly moved, even with me hanging out right next to him.


We also saw one of the two "feeding areas", where a bunch of alligators were cooling off in the shade. You could have hopped the fence here, and gotten down in there with them, but I can't imagine anyone would want to! There were a lot more of them around this area, but this one was by far the biggest of the bunch.


When we were walking along, we came upon a big enclosure, which was labeled King Alligator. This alligator was huge! When we got up there, everyone else in the park was heading towards the feeding pen for the 3pm feeding, so we were the only one around. You can actually get pretty close to the fence, and we were close enough where he opened his jaws and kind of growled at us. Scary!


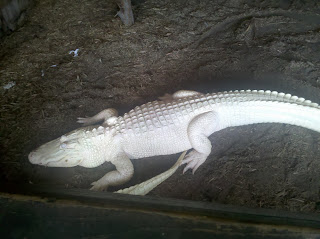
 Next up - an Albino Alligator! This is pretty crazy! The two in the enclosure never moved at all, so we wondered for a while whether they were even alive, but we think we saw them breathe, and no one wanted to volunteer to climb on in and check.


I took a video of feeding time, but it's really hard to see through the chain link fence. Tidbit of advice from the Alligator Adventure feeder: Like stray dogs and husbands, once you start feeding them, they keep coming back. Once alligators lose their natural fear of humans, they think everyone will feed them. If you don't, that's when the problems happen.

As we were leaving, we stopped by the vet clinic, where we happened upon - a bunch of baby alligators! 


All in all, we spent a couple of hours within the park, and really enjoyed our time there. It was great to get to see them all, even if I wouldn't want to meet any of them up close and personal.

Sunday, June 12, 2011

Building a Modern Desk - Part 3


So, the desk is finally completed. All in all, it took us 2 full days, and about $225 to create this desk - but it's not only beautiful, it's extremely functional and incredibly tailor made to us. It spans the entire length of our wall, and has a custom built storage unit included. When we were pricing desks which weren't exactly what we were looking for, the total cost was around $400.

If you missing the beginning of the desk saga, you can find part 1 here, and part 2 here.

So, continuing on where left off, we ended Saturday night with having primed all of the boards, as well as painted them in the gloss black paint that we had picked out. Now, it was on to assembly.

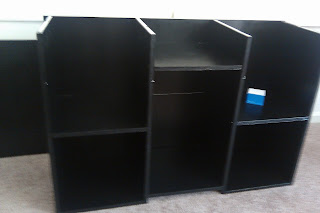
First, we built the shelving unit, which is shown below - it may look weird as it has no top on it, but our desks served as the top for the unit and met right in the middle.


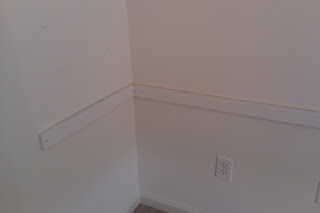
Second, we measured up, and then leveled out the supporting braces for the desk along the back and sides. Basically, the top of our desk is 3/4 in thick piece of wood that is supported along the back and one side by wood, and then on the other end by the shelving unit. 


To prevent bowing in the middle, there are two L brackets on each side mounted into the studs for extra security. You can see one of them here. 


We are so happy with the completed product. We immediately unpacked some of the boxes that have remained packed for weeks now, and loaded them into the desk. Below is the shot of it in it's entirety. As you can see, the middle portion is used to house Tyggy's favorite sleeping cube, so that he can be with me during the day while I work.


This is a shot of Silas's side of the desk, which as you can see is already laden down with electronics. 


Below is my side of the desk, which will generally be used as my work space, but will double as a crafting space on the weekends. 


And, in our happiness at getting everything together, Si also put together the wire shelving that I used to use to hold my crafting items, at which point, I loaded them down with all of my craft stuff. The plan is to get great fabric bins on sale, and put them all in there, but it was just great to get everything in right now.


So that's it! We have an amazing desk, and feel free to ask any questions you may have about creating it yourselves. There was a lot that we had to leave out, just based on not boring you all to death!

Building a Modern Desk - Part 2

We went out to Lowe's last night to pick out the wood. We chose hardwood, 3/4 inch thick, 4x8 feet. These things were huge, but I had looked them up online prior, and had mapped out how we needed them cut. Before I got really into doing home projects for myself, I was always really nervous about how I would get the wood cut, but Lowe's kindly does the cutting for you, for a really minimal price. We got 2 sheets of the wood, and they cut them right to size for us.

For anyone wondering, the cubes making up our storage system are all 14in x 14in, and the desk will sit 29.5 inches above the floor. Our desks are 73 inches long, with about 52 inches of that free hanging. (Well, not really, since it will be secured, but you get my drift).

We also wanted the desk to be black, so we picked up a gallon of white Valspar primer, and a quart of black gloss Valspar paint. I've always been a Valspar fan myself, based on coverage, but what paint you use is obviously up to you.

On Saturday, we got right down to business:

Silas sanded down all the rough edges of the boards with a block sander.


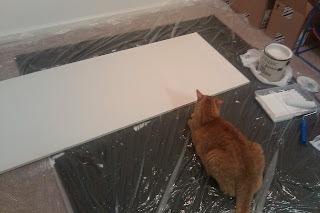
Then Tygg supervised me painting the boards with primer. 


Finally, at the end of the day, we painted them to the glossy black. (Note, this is not all the boards, but all we could fit in the photo).


All in all, prepping the boards, priming them, and painting them was an all day process. As you can probably tell from the last photo, it was pretty late at night, and so I apologize for unforgiving glare from our overheard lighting.

[Update - Sunday, June 12, 2011 - We finished it! Check out part 3 here!]

Friday, June 10, 2011

Building a Modern Desk - Part 1

As previously noted, our new apartment has two bedrooms, one of which I use as an office right now. We're going to turn it into a office for the both of us, as well as a guest room, because the second bedroom also has a bathroom attached to it, making it perfect for our guests to have a little privacy.

Here is the floorplan of what that room looks like now.


As you can see, there are a number of ill placed doors and windows in this room, and overall, it's not a huge room. When thinking about the function of the room, while we feel like we might have guests overnight 2-3 times per year, we have to use it as an office all of the time. So the question became, how do we create an amazing desk, that has room for all Si's computer items, as well as all my craft stuff, and still leaves room for me to function at work? 

Basically, we decide that the best way to do that was to build a desk along the left hand wall, and then basically seal off the storage closet, at the same time adding a sleeper sofa and some club chairs. The first stage of course was to figure out what it would look like before we committed. I used floorplanner.com to map out our walls and doors (all done to scale!!!), and then they also gave me the ability to add furniture (still a little clunky, but you can measure your furniture and also make it to scale). Here is our finished idea:


Basically, during the main point of the year, the desk is the focal point. But once we unleash the sleeper sofa, it becomes a functional guest room, complete with sitting area!

Each of our desks measures 73 inches long, and 24 inches wide, which is perfect for a large desk area to hold a lot of items. We'd also been discussing storage solutions, and though the wooden boxes at Target are fairly priced, we decided that if we are going to build a desk, we might as well build the storage as well. To conserve on much needed space, it's being built as part of the desk unit. A really poorly drawn image of our idea is below!


I'll update this weekend as we complete the project, but it's always helpful to have a beginning post for a project this size. We're very excited about making this happen!

[Update - Sunday, June 12, 2011 - We finished it! Check out part 2 here, and part 3 here!

Tuesday, June 7, 2011

Choosing a Paint Color - Living Room

Well, we're working on choosing a paint color for the living room. As you can see, the tile around the fireplace is kind of a beige color, so since we wanted to go with a gray-ish color for the living room, we selected a number of swatches and hung them on the wall.

This is an absolute must in my eyes. Nothing compares to how a paint color looks during the day, during the night, and with natural versus artificial light. Here's a photo of the samples we've hung. We think we've nailed down which one we want, but we'll hold the big reveal until we paint the walls.